Should I buy a Fermentation Jar kit? My Week with Masontops, Reviewed
By Nicola Lando
-
April 19th, 2023
-

I’m a pretty keen fermenter. There’s a 1.5m long shelf in my kitchen covered with jars of different hues, with small labels made from masking tape indicating contents and heritage.
My husband doesn’t love it to be honest. Although recently I’ve noticed my kombucha bottles finishing earlier and earlier (he’s definitely drinking them rather than emptying them down the sink… I’ve also been clearing out the glasses). Maybe he’s coming round to the fermenters’ gut-health and flavour cult too.
And so it was with delight that I ordered the Masontops kit. New jars - for me - are like new craft kits to my 5-year-old daughter.
What do I need to start fermenting?
I didn’t quite understand what I needed to buy, so I picked up a few different things:
- Mason Ball Fermentation Jars - 6 x 500ml
- Masontops Kit
- Plastic screw tops
The last screw tops I didn’t need after all. But the jars… well I wish I’d ordered more! For marmalade making, pickling, and for my next batch of ferments, when the first set is in the fridge!
The one thing you’ll also want is some good quality salt, without additives and anti-caking agents (table salt is a definite ‘no no’). Diamond Crystal Kosher salt is always in my kitchen, and perfect for this job.
What’s included in the Masontops Fermentation kit - and why?
Each Masontops fermentation kit includes four silicon vented lids, four glass weights, a long wooden tamper and a recipe booklet. You’ll also need four Ball Mason glass jars - the diameter of the glass weights and the silicon lids fit them perfectly.
Each item has a different role:
- The tamper is key for stamping down your vegetables, helping them to release water to make a brine. It also makes sure you can press the vegetables below the brine surface before sealing the jars.
- The glass weights hold the vegetables under the liquid during fermentation, to reduce exposure to oxygen. That reduces the likelihood of moulds developing.
- The vented silicon lid is clever. Fermentation jars need a good seal to prevent bugs, and other matter contaminating your mixture. However, as vegetables ferment they release carbon dioxide. If the jar is sealed tightly the carbon dioxide can make even glass jars explode. These silicon lids have a little hole that opens under pressure to allow the carbon dioxide out, but won’t let anything else in.
First up, simple fermented cabbage
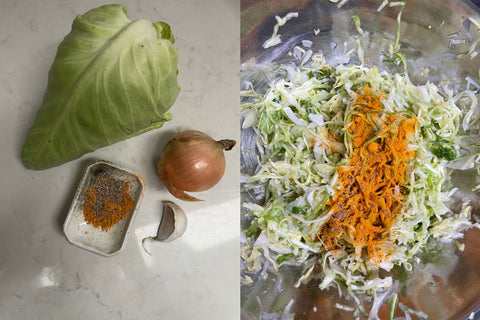
I chose two very simple recipes - admittedly entirely due to the items left over from my last veg box. My first recipe was ‘cure-all’ kraut. Handy, as I’d been starting the week feeling pretty ropey. “Flu be gone” I shouted, slicing ingredients on the mandline. This one was to have cabbage, turmeric, black pepper, onion, garlic and ginger.
MORE: Find recipes and ideas for pickling or fermenting here
Does the tamper make a difference?
Yes! I rubbed together the sliced onion, and sliced cabbage and salt for a while, before tiring of it. I’m sure I’ve read previously you need to knead for a good 10 minutes.
However, grabbing the wooden tamper from the Masontops box, I made short work of it - and soon liquid was able to be squeezed out of the ingredients.
I hadn’t expected much from the tamper - I’ve owned cocktail muddlers before, and they seem too small to be of much use in fermentation.
But this one has a far broader base. It is particularly brilliant when pressing the vegetables down into the glass jars - meaning you don’t have to be quite so cautious about the liquid beforehand.
Even if you don’t press the cabbage so well at the mixing stage, you’ll know you’ll crush it well when jarring it.
My one cabbage ferment was able to squash into two jars. One full and the other only ¼ full. However, after a little more pounding, most of the spilll-over fitted into the first jar. So just one jar of ‘cure-all’ kraut.
RECIPE: How to make fermented cabbage, or sauerkraut
Time to put the new seals to work…
Next I had to look at the Masontops instructions - how to seal the jars? Usually at this stage I’d be doing one of two things:
- Ladling kilos of salted vegetables into my 2 litre (or bigger) handmade fermentation pots, then weighing them down with big kiln-fired stones.
- OR scooping veg into smaller clip top jars, filling a plastic bag with brine as a weight, and praying that bag doesn’t leak.
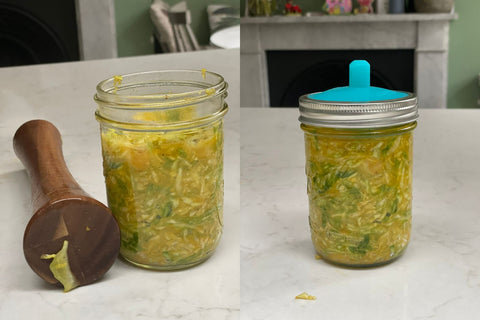
Instead this time, I simply
- Unscrewed the fermentation jar lid,
- Picked up a small, beautifully formed, glass weight - called the ‘pickle pebble’,
- Popped it in the top of the jar to hold the vegetables under the brine,
- Topped the jar with a small silicon lid, and screwed it closed with the jar’s original screw cap.
All in seconds! It was refreshing to have a manageable amount of ferment, made in under 5 minutes.
READ: A beginner’s guide to fermenting
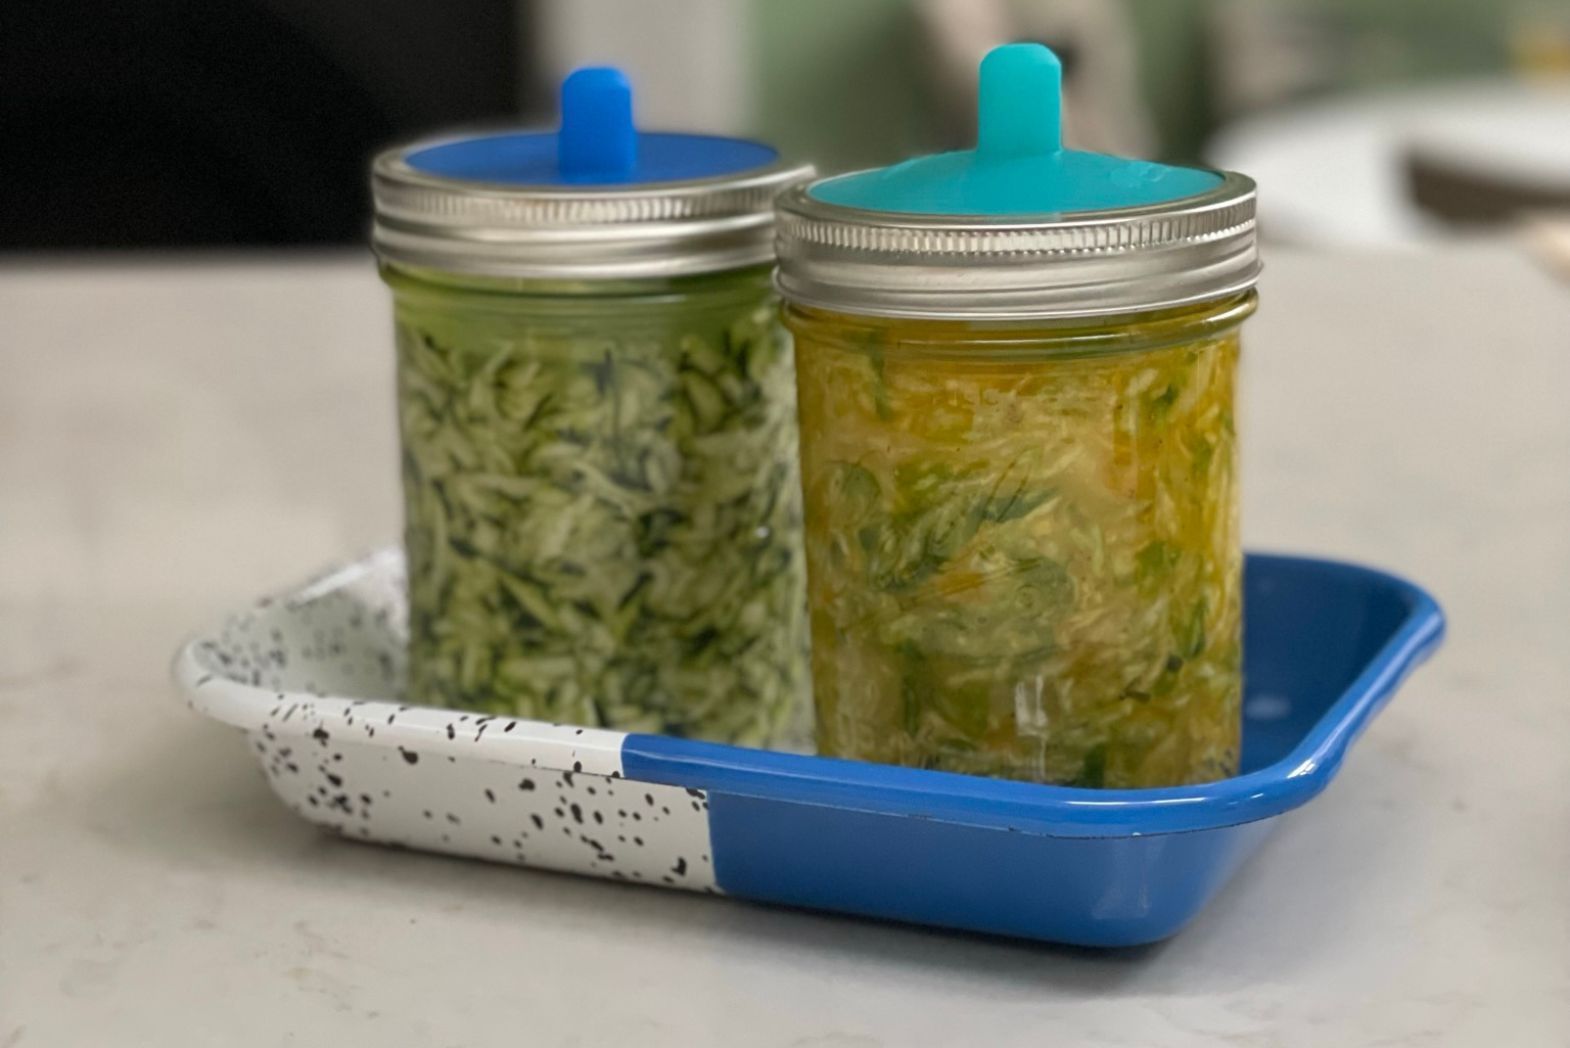
Next, Zucchini kraut - fermented courgette
If I didn’t have two courgettes leftover, I definitely would not try this. But bear with me, fermented courgette fits well in a falafel pitta, or ham sandwich.
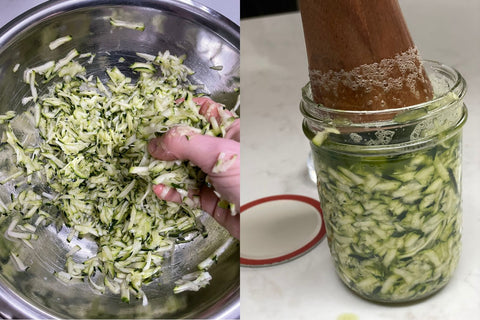
Following Kristin Shockey’s recipe in Fermented Vegetables, I grated my two courgettes, stirred in two teaspoons of Kosher salt, and packed the courgettes into just one jar. Some heavy stamping from the tamper, and soon the courgettes were submerged in brine.
Pop in a weight, top with silicone lid, screw on the top - and now to wait a few days.
What next? And how long did it take to ferment?
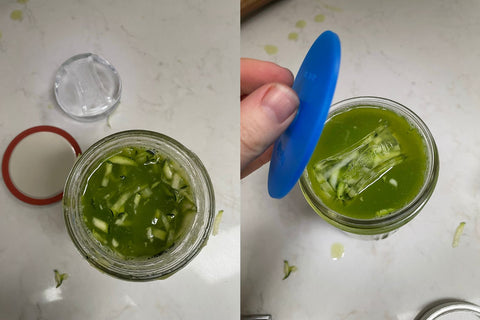
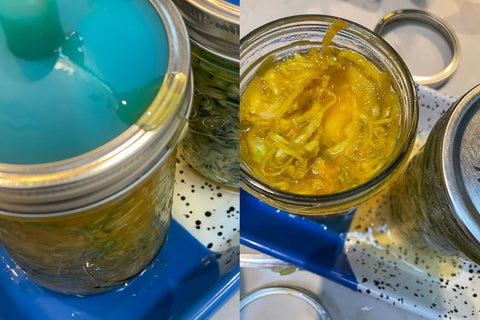
- The zucchini kraut was the fastest - bubbles formed within a day. And within a few days at London-early spring room temperature (maybe 18C) it had a pleasingly sour tang. So I switched over the lids.
- The fermented cabbage was slower. After a few days it definitely wasn’t as sour as I’d like. Although it clearly showed signs of fermentation. 7 days was just right for me - and again, I switched out the silicon fermentation lid, and put back the original gold lid. Saving the silicon for another ferment later that week. As long as you’ve used enough salt, and the cabbage is pleasingly sour and crunchy, the fermented cabbage will keep in the fridge for a good few weeks after the initial room temperature fermentation.
What I learnt using my fermentation jars
- It’s best not to fill the fermentation jar too full. With the gas, and extra liquid released from the vegetables there is likely to be leakage! The courgette kraut was fine. But next time I’d divide the cabbage kraut into two jars, rather than overfilling one.
- Tuck the jars out of sight of guests - the bubbles that seep out of the silicon opening don’t look particularly appetising! Maybe it’s less unsightly if you don’t overfill the jars (like I did!).
- Once your batch has done the initial room temperature fermentation, just switch back to the Ball Mason lids as you move the jars of kraut to the fridge. Because fermentation in the fridge is so much slower, you don’t need to worry about gas build up in the same way. That means the four silicon lids included in the pack are plenty.
- Buy extra jars! Then you can have the second batch fermenting on the side, whilst you enjoy the first set from the fridge.
Should I buy a Fermentation jar and Masontops kit?
Yes. These lids and weights are great!
What’s so good about them?
- They create an airtight seal, whilst not risking any jars exploding if you don’t tend to your ferments regularly enough. Also ideal if you need to leave them whilst going away for a weekend (or even a week!).
- The clever silicon seal means the air inside the jar is slowly replaced with carbon dioxide. Ordinarily when jars are “burped” you let air back in. Yet a carbon-dioxide-rich environment will further prevent moulds from forming, protecting your ferments.
- I loved the weights - it saves me using an extra plastic bag full of liquid to weigh down the ferments. I could put more vegetables in the jars, and I was less likely to risk the bag leaking into the ferment itself.
- The tamper is brilliant. It’s much wider and so more effective than a cocktail muddler I might otherwise use.
A clever, and fun to use bit of kit. Plus it fits the Ball Mason jars - a design classic - perfectly. I’d highly recommend it.
Feeling inspired? Browse all fermenting and pickling guides to start planning your own project.

About the author
Nicola is co-founder and CEO at Sous Chef. She has worked in food for over ten years.
Nicola first explored cooking as a career when training at Leiths, before spending the next decade in Finance. However... after a stage as a chef at a London Michelin-starred restaurant, Nicola saw the incredible ingredients available only to chefs. And wanted access to them herself. So Sous Chef was born.
Today, Nicola is ingredients buyer and a recipe writer at Sous Chef. She frequently travels internationally to food fairs, and to meet producers. Her cookbook library is vast, and her knowledge of the storecupboard is unrivalled. She tastes thousands of ingredients every year, to select only the best to stock at Sous Chef.
Nicola shares her knowledge of ingredients and writes recipes to showcase those products. Learning from Sous Chef's suppliers and her travels, Nicola writes many of the recipes on the Sous Chef website. Nicola's recipes are big on flavour, where the ingredients truly shine (although that's from someone who cooks for hours each day - so they're rarely tray-bakes!).